
How to Cultivate Oyster Mushrooms Sustainably (with Recipe!)
Mushrooms, as a part of the sustainability movement, are enjoying their day in the sun. (like yummy Vitamin D sponges!) Over the last decade, interest in providing our own food has exploded, inspiring people like you to ask the question: “How do I cultivate oyster mushrooms in a sustainable way?”
Mushrooms can be grown with extremely little water and space requirements, don’t require complicated upkeep, and don’t typically require special lighting. You might be aware of new (ish) plant growing techniques like the Square Method or Raised Bed Method which allows us to maximize crop harvests while simultaneously cutting down on space used and tedious chores like weeding and thinning out overplanted (waste) crop. Mushrooms fit beautifully along with this model of efficiency and sustainability.
Did you know that it is possible to grow up to ONE MILLION pounds of fresh mushrooms using just one acre of dedicated farm space?
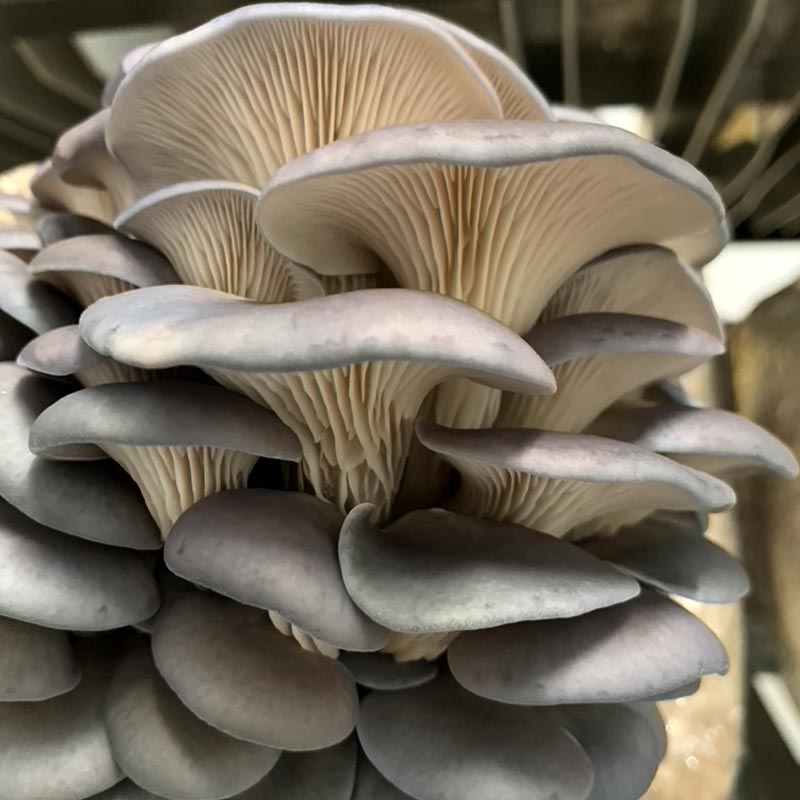
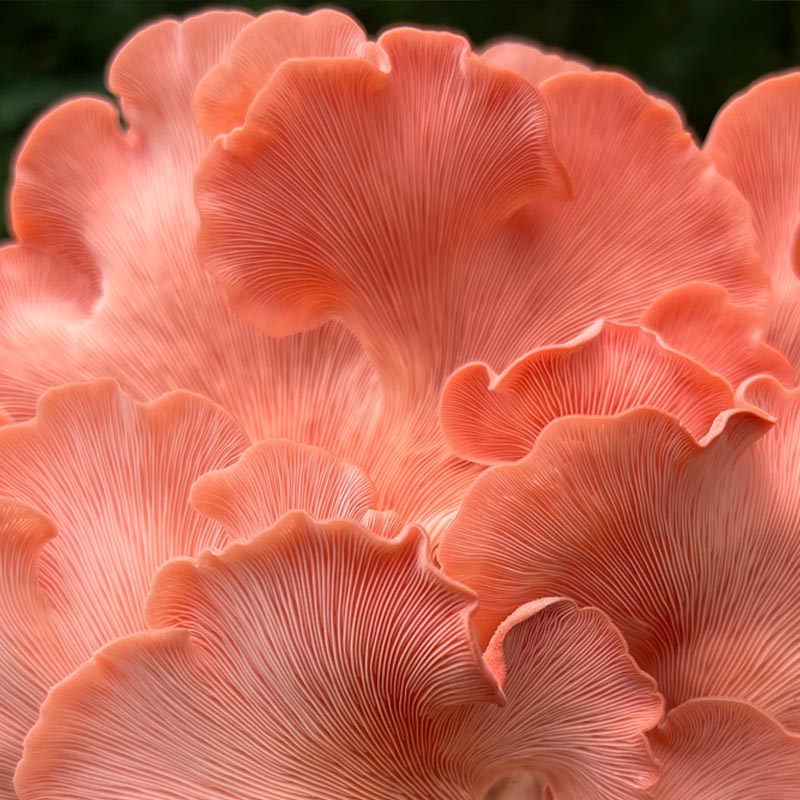
This contributes to the low carbon footprint produced by growing mushrooms. What’s more, mushrooms like Oyster varieties (Pleurotus and Hypsizigus) provide plentiful harvests-enough to feed yourself, your family and friends, and still have some left over to store for the future. Check out this article to learn more about properly storing mushrooms.
Oyster Mushrooms Will Grow On Agricultural Byproducts
Oyster mushrooms of all flavor are amazing fungi that are able to grow from many types of agricultural byproducts including but not limited to: cereal straw, spent coffee grounds, cardboard, denim or other cotton textile materials, hemp hurds, palm fronds, cotton seed hulls, on and on.
This fact makes cultivating mushrooms a great addition to your healthful, sustainable lifestyle.
Beginner friendly DIY approach to mushroom farming
The purpose of this blog is to provide an easy to follow process for how to cultivate Oyster mushrooms at home using readily available substrate (growing material) and containers. If you have been wanting to start your own mushroom garden and you have a container, some cardboard, and you follow this method, you can start growing your own fungi food in a matter of weeks!
How to pick what to grow your mushrooms on
When selecting a substrate for your mushrooms to grow on, choose something you will be able to source at relatively low cost. If you don’t live on or near a cotton farm, you may not want to grow on cotton seed hulls. Do you love to drink coffee and/or work in a coffee shop? Using spent coffee grounds might be for you. Own a hemp farm with access to hemp hurds? Different substrates might work better than others- feel free to experiment and try different things!
No matter what substrate you choose to use, it will need to be processed to get ready to grow fresh mushrooms. If you are using straw or hemp hurd, you will need to either purchase pre chopped or chop it yourself. If you choose to use coffee grounds, you will need to gather and freeze them for 2 weeks before use. Freezing your coffee grounds as you gather them, and for at least 2 weeks once you gather all you need, will help cut down on contamination and ensure the plentiful nutrients will be available to your growing mushrooms.
Helpful hint about using cardboard to grow mushrooms
If you choose to cultivate mushrooms on cardboard, shred it into small pieces and make sure it is free of heavy metals- if there is colorful printing on the box, make sure the cardboard was printed in the USA.
How to prepare your substrate before you start growing mushrooms
Before you begin your cultivation project, you will need to prepare, then pasteurize your substrate so that your mushrooms will be able to thrive with little environmental competition. Preparing your mushroom-growing-medium is essential because by pasteurizing your substrate with heat and/or pressure, you will be removing many harmful competitor fungi and bacteria that could lead to contamination and leaving in some beneficial microorganisms (other bacteria) that will actually help your mushrooms grow. To set you up for mushroom cultivation success, Mushroom Mountain goes the extra mile and only ships out bags of mushroom spawn that have gone through a strictly followed sterilization process.
Break down your substrate enough to pasteurize but not too much to decrease air flow.
Before you begin the substrate pasteurization process, you will want to examine your substrate and remove any large chunks of debris present. If you choose to use straw, chop or shred it into pieces no longer than 2 or 3 inches long. Same with cardboard, shred it all into small pieces, etc. These smaller particles will be easier to mix with the spawn and will help you fit it into bags for heat treatments.
Important note: don’t make your material too small.
Since the mushroom mycelium needs air to grow, always make sure there are some air pockets visible. (i.e coffee grounds work great but espresso grounds may be too fine.)
Pasteurize your substrate.
Now that you know how to prepare your food-for-the-fungi for good oxygenation, it’s time to learn how to effectively pasteurize substrate for mushroom growing. There are many ways to pasteurize substrate for mushroom growing. In this article, we will cover two popular beginner friendly methods. Follow either of the methods step by step to ensure success when growing your oyster mushrooms!
How to pasteurize your substrate with the hot water bath method
You Will Need:
- Large pot or other vessel
- Heat resistant bags or containers
- A digital thermometer
- Something to keep your bags submerged
The Process:
- Place your prepared substrate in a mesh bag or other heat resistant bag or container.
- Boil your water in a large pot or other vessel and monitor the temperature with a digital thermometer if you have one.
- Once the water comes down to the 160-180F range, add in your bagged substrate and make sure it stays submerged.
- Add a weight to keep the buoyant substrate submerged.
- Use your thermometer to maintain the temperature of 160-180F for at least two hours.
How to use hydrated agricultural lime as a low tech pasteurization method
You Will Need:
- Hydrated lime
- Large soaking bin
- Cool water
The Process:
- Mix hydrated lime and water at a ratio of 4 cups of hydrated agricultural lime per 55 gallon drum of water. This translates to: 13.75 gallons of water to 1 cup of hydrated agricultural lime OR 3.4 gallons of water to ¼ cup hydrated agricultural lime.
- Once you add lime to water, let it get cloudy, then add the shredded substrate material to soak it overnight.
- Drain your pasteurized substrate and mix in your spawn.
With all that prep done, now drain your shredded, bagged and pasteurized substrate material and place it onto a clean workspace. For easy cleanup, consider cutting a large plastic bag open and spreading it over your work surface like a tablecloth.
Sanitize and make sure you clean your work surface by spraying with chlorhexidine or 70% alcohol, but be sure to let the alcohol evaporate fully before you begin to mix. This is important because alcohol doesn’t work to clean the surface until it completely evaporates, so patience is a must.
Once your shredded, bagged and pasteurized substrate material has drained and is no longer dripping or too hot to touch, spread it out on the clean space.
Now you can mix in your spawn (in this case Oyster Mushroom Spawn)! Mix the substrate and spawn with your alcohol cleansed hands.
Fill your fruiting containers.
Place your newly inoculated material into fruiting bags or other fruiting containers. Try to find or use containers that you already have lying around. You may have to drill holes to allow water and air to flow into and out of the container.
Here are some fun ideas to consider for growing containers:
- Coffee Cans
- 3-5 gallon buckets (drill holes every 6 inches)
- Used nursery pots (no holes needed)
- Laundry baskets
- Milk jugs- cut them in half and grow out of the bottom
- Lunch Boxes
- Old Coolers
- Old Suitcases
- Plastic Bags
- Use your imagination- the sky’s the limit!
Provide sufficient fresh air exchange (FAE)
In order for the mushroom spawn to grow and develop, the mycelium will need constant access to fresh air. Mushrooms inhale Oxygen and exhale carbon dioxide, just like humans. Without providing access to fresh air, the spawn/substrate mixture will go anaerobic- it will die from lack of oxygen. Using a small drill bit, drill small holes in an evenly spaced pattern all over your growing container. If you choose to grow mushrooms from bags, use a sterilized push pin or sewing needle to make your evenly spaced holes all over your bags. This is known as providing sufficient fresh air exchange (FAE) and skipping this step is one of the more frequent ways beginner mushroom cultivators can go wrong.
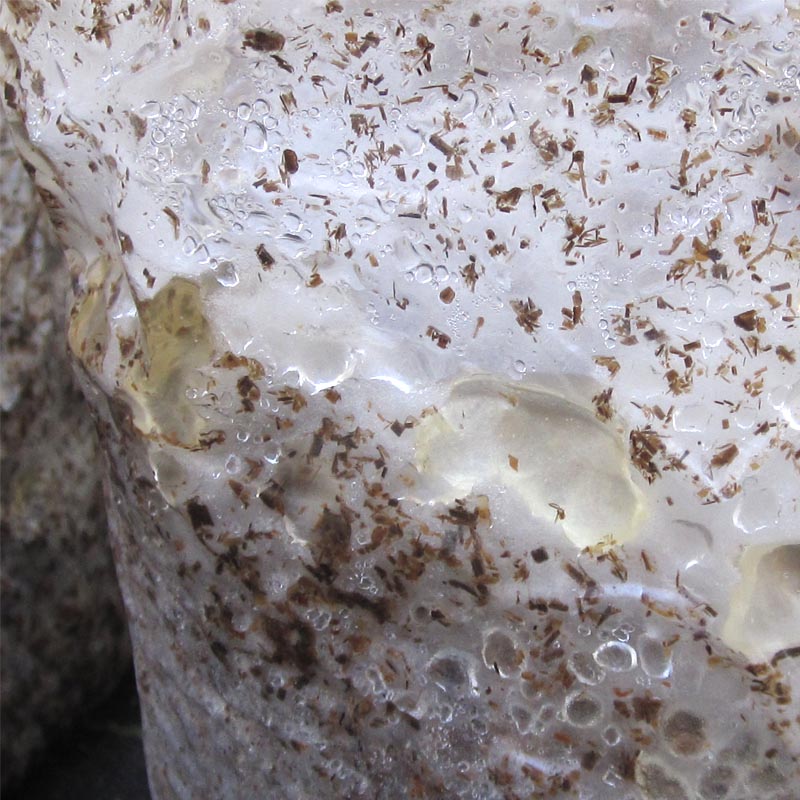
The colonization phase needs time + temperature + moisture.
Now that you have introduced your oyster mushroom spawn to your prepared substrate and bagged it or put it into containers, it is time to let the mushrooms do their big work. Colonization occurs when the mushroom mycelium has “eaten” or colonized all the contents of your substrate. To enter into colonization phase, place your container in a dark area in a room that maintains temperatures between70-80°F. The length of time it takes for your mushrooms to colonize will depend on what substrate you are using, the size of your containers/bags and the type of oyster mushroom you use. When you see that the substrate material is covered by white cottony mycelium, colonization has occurred. Plan for 2-5 weeks colonization time. Make sure to cover your containers so they do not dry out.
Fruiting cycle phase means more light + water mist and your first sign of fruiting bodies!
Once your container or bag is fully colonized, your project is ready to shift into the fruiting cycle. Move your containers or bags to a brightly lit area and mist all the holes over your growing container with a fine mist of water twice a day. The light will help the mushrooms develop their correct color and shape, watering will allow for formation and keep your project from drying out.
As a bonus, a brightly lit area with indirect sunlight will help your mushrooms to accumulate vitamin D, a vitamin that becomes bio-available to you when you cook your delicious mushrooms! You may find it necessary to keep a clear plastic bag over your containers to keep the humidity high in the direct growing area.
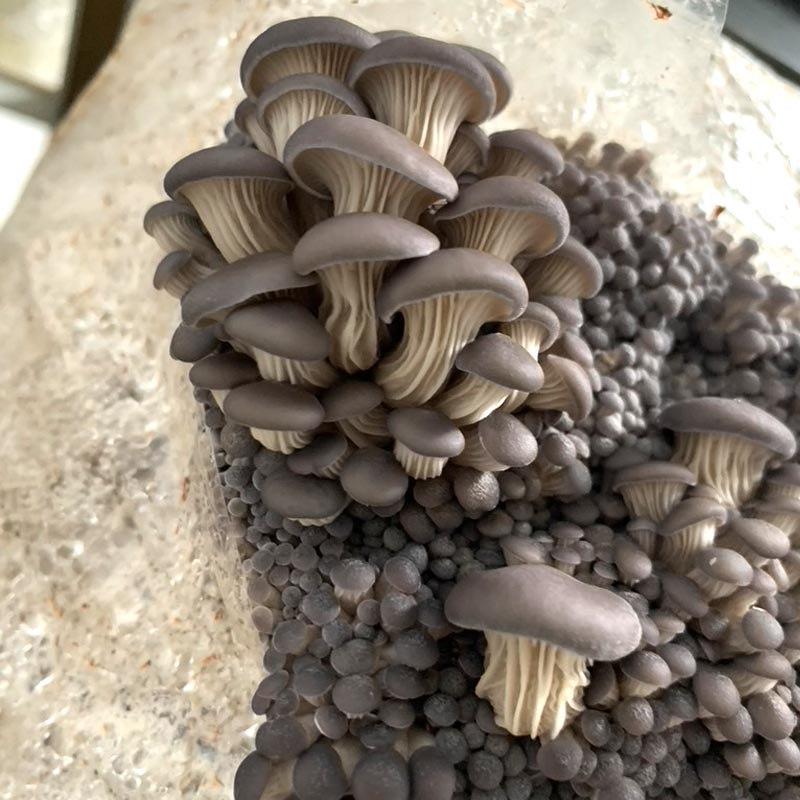
Keep your “pinning” oyster mushrooms happy so they don’t abort the mission to get eaten.
Grand mushrooms have humble beginnings! Soon, you’ll begin to notice baby mushrooms called pinheads forming near or coming from the holes you either drilled or poked in your bags. Look at the above picture for a beautiful example of mushroom pinheads forming. You’ll need to start paying extra attention to your cultivation project at this point to make sure it does not dry out.
If proper moisture, light and fresh air conditions aren’t maintained, your mushrooms will dry out and they will “abort.” The mushrooms will detect that there are not favorable conditions for growing fruit bodies, and your project will enter into a storage cycle- it will “abort” mushroom fruit body attempts and save energy until conditions improve.
Oyster mushrooms will double in size every day in the fruiting cycle.
Mushrooms develop quickly from pinheads to mushrooms. In fact, Oyster mushrooms double in size every day, on average! If you have covered your project with a clear plastic bag as a humidity tent, remove it one day before your anticipated harvest to allow the mushrooms to dry a little in-between your regular watering.
Harvest your home grown oyster mushrooms!
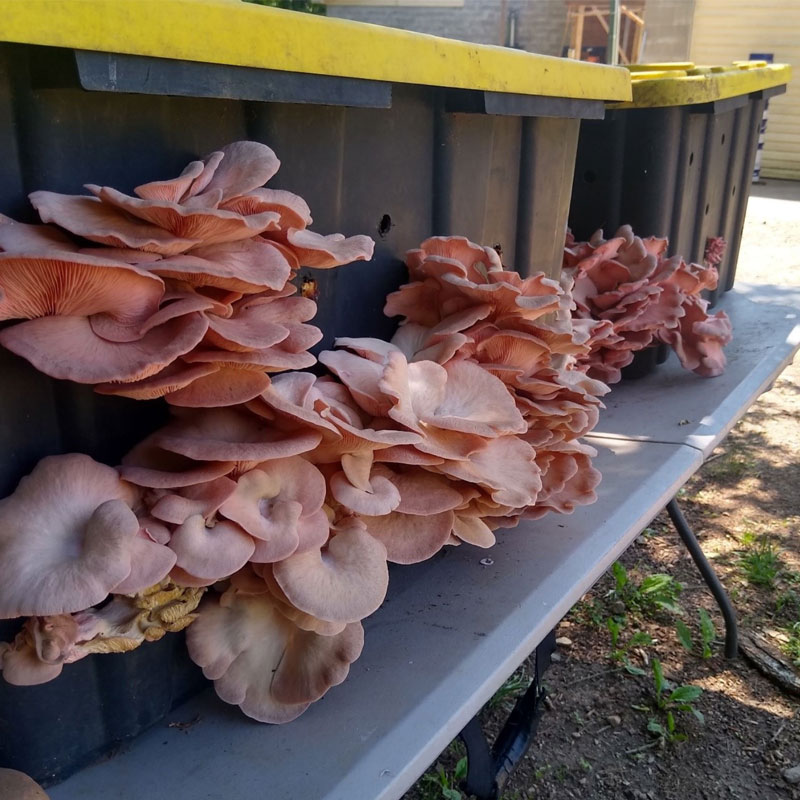
When your mushrooms stop doubling in size every day, and you begin to see the caps of your mushrooms flattening out or curling under, it is time to harvest. You will notice that the rim of your mushrooms will become thinner and lose the tiny ridged lip underneath the rim of the cap. They also become flatter and no longer as rounded on the edge of the cap.
When in doubt, pick sooner rather than later for the best taste!
Storing your cultivated mushrooms after harvesting
Store your oyster mushrooms inside a paper bag in your refrigerator for about one week to ten days. Wait to wash your mushrooms until you are ready to cook with them. Storing your mushrooms in a plastic bag or container will make them sweat and develop bacteria, which leads to slimy rotten mush. Bottom line, always avoid storing harvested mushrooms in plastic!
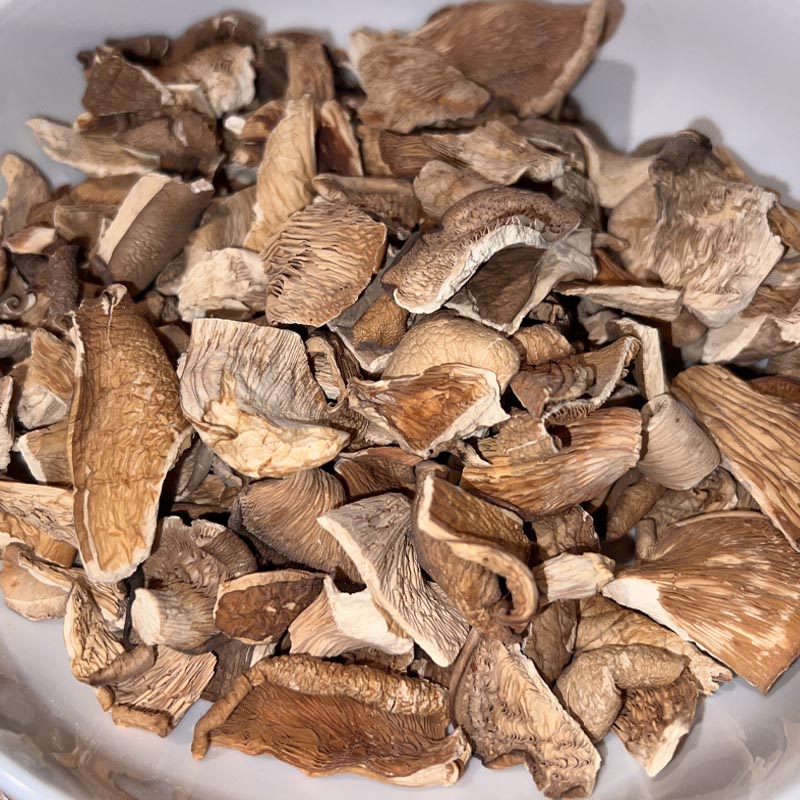
For long term storage, dry your mushrooms on a dehydrator tray. Cut your mushrooms into small pieces and lay in a single layer, with no pieces touching. Set dehydrator to 125F/52C for 3-8 hours. Mushrooms are done when they are brittle and snap or break- not when they bend. Store dried mushrooms in airtight containers like labeled mason jars.
Helpful hint to boost your nutritional yield from freshly harvested mushrooms
Lay your freshly picked mushrooms gill side up in the sun for about 30 minutes. Your mushrooms will absorb vital vitamin D which becomes bioavailable to you when you cook them.
Rehydrating your dried mushrooms
To rehydrate your dried oyster mushrooms, simply place them in a small bowl of nearly boiling water, cover and allow to sit for 30 minutes. The mushrooms will be soft when they are done. Save the soak water and add to soup bases for an extra nutritious flavor burst! Rehydrated mushrooms may need to cook a little longer than fresh, to cook the soak water out.
Source your high quality oyster mushroom spawn
Sawdust spawn is versatile, affordable, and can be used for logs, stumps, wood chips, mulch, coffee grounds and pasteurized agricultural byproducts. Sawdust spawn also stores up to a year in the fridge for most species, so you don’t have to use it all at once (but totally more fun to find more bucks and pasteurize more substrate right?!)
Mushroom Mountain Sawdust Spawn and Fruiting kits are all packaged in biodegradable filter bags meticulously prepared by our passionate myco-obsessed team .
Click here to check out all of the oyster mushroom varieties we can ship right to your door!

Oyster Mushroom Recipe from the Mushroom Mountain Team
Oyster Mushroom and Garlic Ginger Stir Fry
For the stir fry
- 1 1/2 cup uncooked brown or wild rice
- 2 tablespoons olive oil
- 14 ounces extra firm tofu
- 8 ounces oyster mushrooms
- 1 cup broccoli florets
- 1 cup chopped zucchini
- 1 cup carrots sliced at an angle
- 1 purple onion, minced
For the garlic ginger stir fry sauce
- 3 cloves garlic
- 2 tablespoons fresh ginger
- 2 tablespoons honey (more to taste)
- 1/2 cup low sodium soy sauce
- 1/4 cup water
- 1/4 cup rice wine vinegar
- 1/4 cup olive oil
INSTRUCTIONS
- Sauce: Puree all the sauce ingredients together in a food processor until smooth. Set aside.
- Prepare rice or farro according to the package directions.
- Prepare tofu: Line a plate with paper towels or a cheese cloth and place your tofu on it. Gently squeeze as much water as you can out of the tofu block, careful not to squeeze too hard and distort the shape of the block. Replace wet paper towels/ cheesecloth with fresh ones- cover both top and bottom of the tofu block. Place a weight like a cast iron skillet on top of the block and leave for 15-20 minutes, while the rice cooks. This will push out all the water from the tofu, leaving you a nice firm block. The block should be much lighter than when you began and should NOT be dripping wet.
- Tofu: Dice the tofu block into bite sized cubes. Add oil to the pan and heat on medium high. When the oil is shiny, add the tofu and about 1/4 cup of the stir fry sauce (watch out because the sauce and oil will spatter a tiny bit – have a cover ready or just skip the sauce at this point). Pan-fry the tofu until golden brown. Remove from the pan and drain on paper towel lined plates.
- Mushrooms: heat a pan over medium high heat and add oyster mushrooms. As they begin to release their water and it burns off, add a bit of olive oil and a light sprinkling of salt. Sautee for about 10 minutes, until edges are crispy.
- Veggies: Return the pan to the heat and add the carrots first and cook for 3-4 minutes. Then add the zucchini and onion, with 1/4 cup stir fry sauce. Cook for another 3-4 minutes, until veggies are heated through and tender-crisp. Arrange the oyster mushrooms, veggies and tofu over the cooked rice or farro, and cover with more sauce to taste. Sprinkle with green onions
Blog by: Lizza Bixby

10 thoughts on “How to Cultivate Oyster Mushrooms Sustainably”
What great info and a lot more clearly described than some sources. Question- if I am using coffee grounds, so I still have to pasteurize them if they have been frozen for 2 weeks? Thank you!
You don’t have to pasteurize them, if they have been frozen for 2 weeks.
Hi there,
I would like to know the fruiting temperature of pearl oysters mushroom. Thanks!
Pearl Oyster mushrooms fruiting temp is 60-70F. You can find fruiting temps for all of our strains here: https://mushroommountain.com/zone-fruiting-map/