

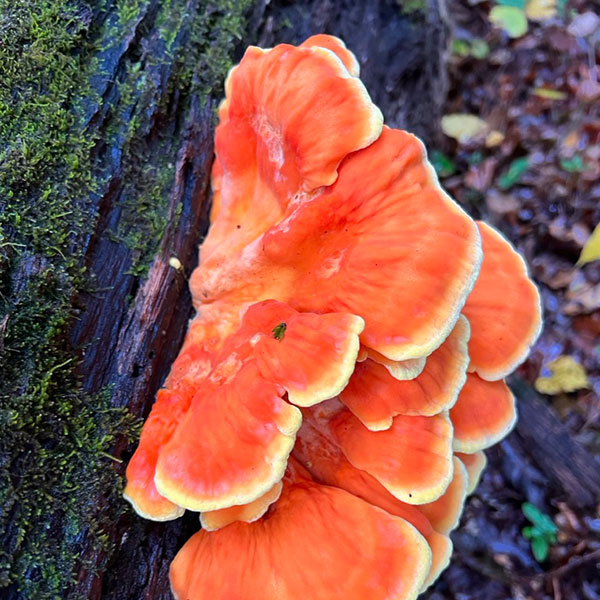
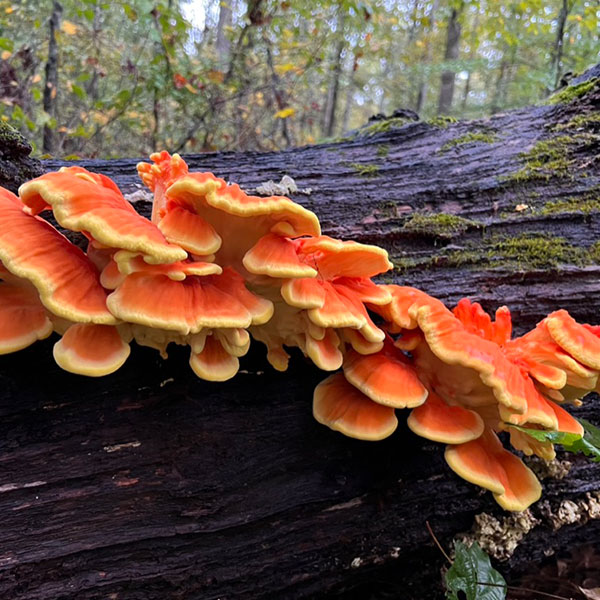
Who doesn’t love chicken of the woods? I adore this mushroom. It fruits very prolifically spring to fall in the wild, a gorgeous bright orange mushroom that has the texture of, you guessed it, chicken. In this post we will explore a proven method on how to grow delicious chicken of the woods mushrooms in your own back yard.
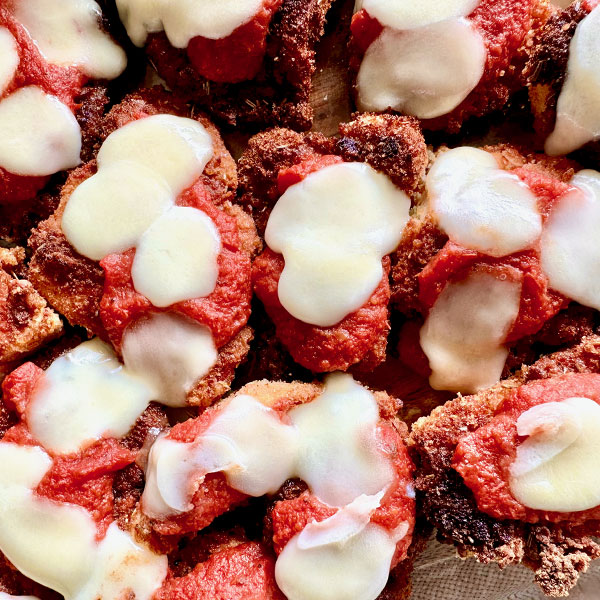
When Megan was visiting us last year from Colorado in the fall, her, I and Billie went into the woods hiking looking for mushrooms, and we found a nice fresh specimen. We took it home and made chicken of the woods parmesan. It was delicious, and I was shocked that you could hardly tell the difference from real chicken, except for after eating, I didn’t get that heavy feeling in my belly like I do when I eat animal flesh.
I would eat chicken of the woods mushroom
as substitute for chicken any day.
According to WebMd, 1 serving contains 10% protein, 75% carbohydrates, 3% fat, and 140 calories. It is a great source of Potassium, Vitamin A and C, antioxidants and flavonoids.
Flavonoids are phytochemical compounds, and possess many medicinal benefits such as anti-inflammatory, anti-viral and anti-cancer properties. Food as preventative medicine, nothing better than that.
Score!
Just a few weeks ago, Billie sent me a photo from the woods while walking her shiba inu Zen. A bright shining orange mushroom, like the sun before it sets on the horizon, chicken of the woods. She gave me the whole specimen to turn it into something. So I made chicken parmesan again.
I cut the chicken up into two groups. The tender parts and the hard parts. The hard parts I cut those into smaller chucks, boiled them for about 20 minutes, drained them, and straight into the dehydrator. Once dehydrated completely, I powdered them, and now I can use that as seasonings, soups or sauces. You are probably wondering why am I boiling the mushrooms first. Why not just dehydrating?
Reason number 1: Chicken of the woods contains a fair amount of oxalic acid, which can lead to gout, kidney stones and inflammation, if your build up too much of it in your system, so when you boil it, a lot of the oxalic acid will leach out. Also some people can have an allergic reaction for this reason, so best to boil it first, and throw the water you boiled it in away.
Reason number 2: Mushrooms are made of chitin, and your body can’t break chitin down, but if you expose it to heat, those chitin walls will break down, and when you consume it, your body will be able to absorb the nutritious compounds that were sitting behind that chitin wall.
A delicious way to cook chicken of the woods
The tender parts are also boiled for the same reasons I boiled the hard parts. These I boil in a bit of salty water. I set them aside and start putting together my deep frying ingredient station: Flour, egg wash and breadcrumbs. I season each one of these steps. Use whatever seasonings you enjoy, but I do salt, pepper, sage, garlic and onion powder, rosemary and thyme. Roll in flour, then egg wash, then breadcrumbs, then into your frying pan. I use olive oil, but some people swear that olive oil takes away from the true taste of mushroom, cause it is strong, but I prefer cooking in olive oil anyways. It’s the European in me.

After this step, you will heat up your oven to 400F, place your chicken morsels on a baking sheet, smother in marinara sauce, and top with fresh mozzarella cheese. Bake until the cheese is melted nicely. Your kitchen is going to smell so good, and you might burn your face off from not being able to wait for it to cool down a bit, LOL.
If you can’t find it, you can grow it
Now that I have gotten you excited about eating this amazing mushroom, let’s talk about cultivating it in your garden. (WARNING: this method will require a pressure cooker, and a flow hood for a guaranteed mushroom harvest, but I will talk later about some alternative methods which we are trying out currently at the farm 🙂
Up to a few years ago, growing chicken of the woods on logs intentionally was almost impossible. When we have inoculated fresh giant logs with chicken of the woods spawn, they never produced anything. In fact, in my own woods, I have large totems made of oak wood from 10+ years ago, they are still standing, but have never produced any edible mushrooms.
But recently, we have done some experimentation with sterilizing small hardwood logs, then inoculating them, leaving them in the bag to colonize, then after a period of time, we set them out into the woods, and waited. Lo and behold, one day, the logs fruited. We were all shocked and pleasantly surprised. It actually worked. Then we tried a few more times, and we were able to reproduce our experiment.

Here is how we did it:
Supplies
- Sawdust spawn: https://shop.mushroommountain.com/collections/sawdust-spawn/products/chicken-of-the-woods-laetiporus-spp-sawdust-spawn-5lb
- Autoclavable bags with filter (large enough to fit your log): https://shop.mushroommountain.com/collections/mycogardening-supplies/products/autoclavable-biodegradeable-gusseted-bags-type-3t
- Soaking tank
- Smallish logs, we used 1-2ft (30-60cm) diameter and 2ft (60cm) long
- Pressure Cooker, large enough for log to fit in
- Flow Hood
- Sawdust Spawn
Directions
- Find a small enough log that will fit into your autoclavable bag
- Soak log in soaking tank for 1 week, you might have to weigh it down with a rock, brick or
similar heavy object - Replace water every couple of days
- Place log into autoclavable bag
- Autoclave for 4 hours at 15psi
- Take out in front of your flow hood
- Inoculate with sawdust spawn. Use about 2 lbs of spawn
- Let colonize in dark room at 70F for 2-3 months
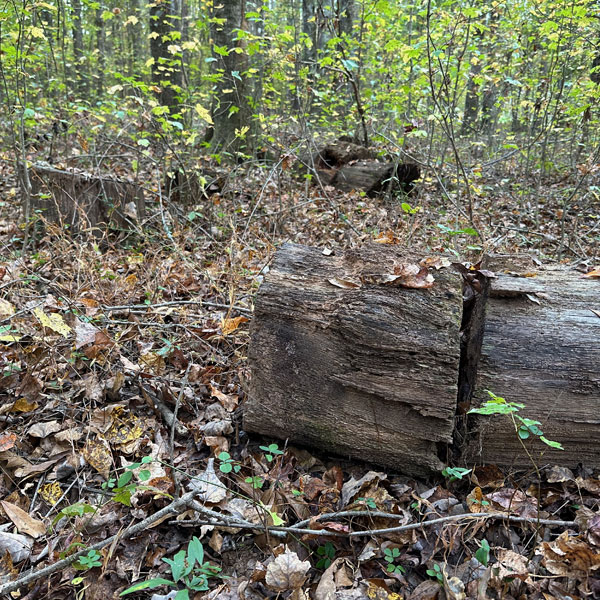
- Set out your log outdoors in shade
- Water log if it doesn’t rain for 2 or more weeks
- Watch log for fruit. Depending on when you inoculated it can take anywhere from 6 months
up to a year and a half for your mushrooms to show up
But I don’t have a pressure cooker and a flow hood!!!!!
For those that don’t have a pressure cooker and a flow hood, there is hope for you as well.
What if you could submerge a log in cold water for a prolonged period of time to ferment it? Submerging it would kill all the aerobes and then drying it, all the anaerobes would cease to be.
I read on permies.com that this works for sterilizing wood chips, but for logs it might be a bit harder and require more time, because logs are much bigger, and perhaps the water would not reach all the way to the center of the log. But I am thinking, if it is a pretty fresh log, then this would not matter.
Leigh, our lab leader says that all this could work, but that the water needs to be changed out every day. And that sounds pretty wasteful, but if you had a creek, then it would work. We are going to try this method and report back here in the near future.
After soaking it for a prolonged period of time (about 2 weeks), then continue these steps:
- Inoculate with sawdust spawn. Use about 2 lbs of spawn
- Let colonize in dark room at 70F for 2-3 months
- Set out your log outdoors in shade
- Water log if it doesn’t rain for 2 or more weeks
- Watch log for fruit. Depending on when you inoculated it can take anywhere from 6 months
up to a year and a half for your mushrooms to show up
Now you know how to grow your own chicken of the woods. Those days of being jealous of other peoples’ instagram posts of gorgeous and plentiful harvest are over.
Growing other mushrooms with this same method
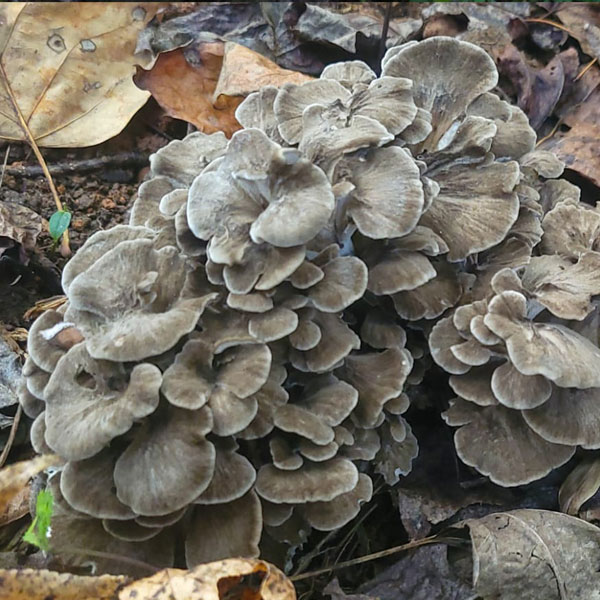
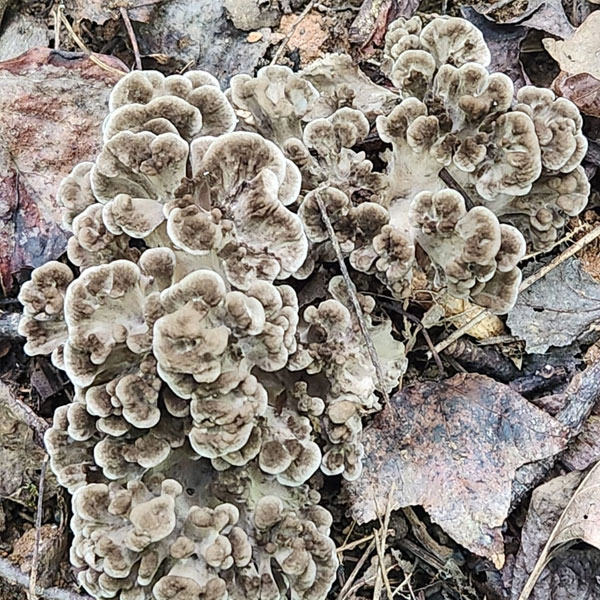
We have tried this same method with Maitake (Grifola frondosa), and we got mushrooms this year. We are suspecting that the same method will work with Cauliflower (Sparassis spp.), and Beefsteak (Fistulina hepatica). Stay tuned.
Please leave us pictures and comments if you have tried this method, and let us know if it has worked for you. Thanks for reading!
Hugs, Olga

22 thoughts on “How to Grow Chicken of the Woods <i>(Laetiporus spp.)</i>”
Hi there great article and planning on giving it a go. I don’t have a flow hood sadly and wonder if it’s necessary? I assume it’s so that you don’t cause contamination when inoculating your log but perhaps if in a clean enough environment it would be fine?
I think you could totally get away with it without the flowhood 🙂 Let me know how it goes.
To inoculate, do you juts pot the log and spawn together the bag or cut into the log too.
We just add the spawn into the bag with the log, no need to do any cuts or drillings.
I found way more than I could carry last week while huckleberrying at about 5000 ft. This was my first time finding COW that was fresh and beautiful, instead of so old that I really wasn’t sure what it was. I set down my berry pail and took off my outer oversized cotton shirt that helped keep away deer flies. Laid out my shirt and harvested about a third of what I had found.
Once home I chopped, sauteed and over the next two days added them to a few different dishes. Very enjoyable and no digestive system side effects at all.
With what I learned on some YouTube videos nothing was mentioned about boiling first.
Yes, some mushrooms that are fibrous as the chicken of the woods, can make people sensitive to chicken of the woods. Not everyone is sensitive, but it does happen.
Hi, I absolutely loved your article, so informative!
I’m wondering if a traditional boiling method would work in order to have a properly sterilised log ready to be inoculated or smeared with spores.
Please, let me know 🙂
Giorgia
You would think that boiling long enough would achieve sterilization, but it is not how it happens unfortunately. You need the pressure added.
Is there anything else unsafe that could be mistaken for this? I have what looks like the pictures of many bright orange half “pancakes” on some fallen trees but like a bunch of others I come across I’m never confident on being able to safely id things.
Hey Tom. There are some lookalikes for sure. But once you learn the chicken, it will be super easy to identify it. They do look a bit like orange pancakes, I have to admit LOL! They usually fruit in large amounts on hardwood trees. They have a porous fertile surface, which can be white or sometimes yellow, and they are velvety on top. Most of the times they cluster. Chicken of the woods is a polypore, which means they have tiny little pores where spores are created, and not gills.
A 2-foot long log in a pressure cooker? You folks aren’t from this planet, are you…
LOL! We have large pressure cookers at the farm. But you can do smaller logs too.
How about growing in wood pellets, like shitaki..
Think this may work?
I have seen some successes with this type of cultivation, but it is not a sure thing. They grow from logs being done with this method every time.
Great to see things still cranking along with your educational mushrooming! Hope to catch up with you sometime this Fall at the farm!